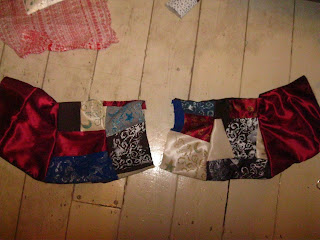
Once I was completely happy with it I pinned it and stitched everything together. This was a finicky languorous process and not particular enjoyable either.
Then it was a case of cutting out all the pieces I needed and pairing them with the pieces for the back that I cut out ages ago.
I stitched everything together and then I could start laying out and pinning on the steel boning. I decided to sew it all in by hand because after using the machine on two strips of boning I had gone through five needles.
I've never made a corset with a busk bone that opens before, so it was a little bit of a learning curve. It's not something that I could do with the machine since I needed to navigate around the closures.
Once the boning was in I had to put in a couple of darts, and I still have to put in more since it's far bigger and looser than I'd like.
I had to get my dad's help to but the eyelets in since whenever I try I mash up all the bits that bend backwards over the material.
The last thing I needed to do was slit the fabric over the top of the catches that slip into the closures, I then roughly stitched around the edges to ensure that they wouldn't fray so easily.
I have a few minor adjustments to make and then I can take some pictures of the finished thing!


This is impressive! I own quite a few corsets but had never really thought about the difficulty of sewing around the busk before!
ReplyDelete