(Please note. To reach the first post on this blog you must scroll all the way to the bottom of this page and click the 'older posts' button before scrolling to the bottom of that page too.)
~*~
I
have found this overall to be an interesting experience, new lessons in
juggling were learned (or not learned as the case may be. Perhaps 'are
to be learned' is a more accurate statement) since I was managing this
hand in hand with a full time college education. Looking back though I'm
proud of what I've managed, and I'm happy with what I've produced.
The
skills that I've picked up from simultaneously running a workshop and
tutorial will come in handy, even if that is just by making any
tutorials I film in the future seem ten times more laid back because I
won't have to worry about other people. I'm also looking to try out some
new methods of printing t-shirts, I'd like to progress to mixing
transfers with screen printing to get layered designs and different
effects for different areas. And I've also learned from creating my
second corset; I need to alter the pattern, flaring it more over the
ribs and cutting it far smaller not just on the waist but all over. I'd
also like to learn more about the placement of boning and how it affects
the fit and comfort of the corset.
There have
certainly been things I haven't enjoyed, such as documenting my
progress. That was a veritable hell this time 'round, I have found it
harder to elaborate upon and embellish my posts due to the cut and run
attitude of evaluation that I have unfortunately and unwillingly
appropriated from college. To fix this I've started posting on my
personal blog again, writing and reading more poetry. To start with I
got a book of Alfred Lord Tennyson's poems out of the library With any
luck my writing style will become florid and grandiloquent again.
Despite that though I've been offered an opportunity to guest blog by
Lori of Rarely Wears Lipstick, which is rather brilliant I think!
All I can say now is... I hope you enjoyed reading!
Friday 1 March 2013
My Arts Challenge In Review
I'M FINISHED!!!
Feels so good to be able to type that, you have no idea. Oh but I hope I'm not making it sound like I didn't enjoy myself, I certainly enjoyed some elements. It was incredibly gratifying to see all these little projects unfold, I think the best of which is my patchwork corset. I wore it to college the other day and got some really positive feedback from everyone there, most of the people who saw it hadn't realised that I'd made it and were incredibly impressed when I said that I had. But then having said that I feel that the confidence I gained from wearing my Miku costume (the one with the free handed silk panels) on stage at LFCC is enormously important and that experience has given birth to a tenacious, gnawing desire to enter more cosplay competitions. And to top it off I've gotten some rather brilliant ideas for t-shirts, so it's been pretty win-win really.
If I was going to do anything differently I'd certainly give myself more time. If I'd been able to I would much rather have done this as a summer project so that college didn't interfere and vice versa. I won't say it hasn't been stressful doing both since I've had to keep up with course work and hand in final pieces for two projects (one of which I got the grades back for, a merit and a distinction) at the same time. Aside from timing though, I wouldn't change anything. Every mistake has been an education and every success has magnified my ego.
T-shirts: Finished Pictures
The process for creating these transfers was relatively simple. I scanned in the original screen prints, cropped and re-sized them slightly then printed them out onto transfer paper. Another hitch I hit with the 'Firefly' inspired one was that we used our last sheet of dark transfer paper and messed up with the printout, having reversed it without actually needing to.
Once they were dry, I laid them down, face up on their respective tops, put the provided paper (which is really just baking paper) over the top and iron them to fix them onto the shirts.


The first one I did was the plain Emilie Autumn one. I hadn't done this in a while and I kind of screwed up a bit on the bottom, but I actually don't mind. I think it adds to it. In fact I want to weather this one, soften it up and make it look really worn and scraggy. The vest that I used was actually ribbed, something I hadn't considered when buying it, there was a temporary worry that the transfer wouldn't take to it very well and it would just split down the lines, but it didn't and looks great over the ribbing.


This was the second one I did. The screen print I used was one that I had taken and embellished with ribbons, lace, buttons, beads and a safety pin or two. I actually mounted the original screen print on a piece of fabric so that it would hold up better which is what the stitches you can see up top are there for.
I'm not sure I like this one as much as the first, I think it would look a whole lot better if I'd used a plain print then sewn ribbons and nicknacks to the actual top, just to give it another dimension. It looks very flat to me. Whilst I'd wear the first one out, I'm not so sure I would wear this one...
The third and last one I did was the 'Firefly' inspired one. I really like it as a poster, and I think it would work better on a t-shirt if browns blended together better and if it wasn't done with transfer paper and rather printed or screen printed on.


It turned out quite faded, which would be a good look if it was kind of patch and looked accidental, as if it had happened over time but it's kind of all over and meh. I guess it must be because it's a dark transfer on a dark shirt? I'm still happy with it though, don't get me wrong!
Sunday 24 February 2013
Corset pictures: updated
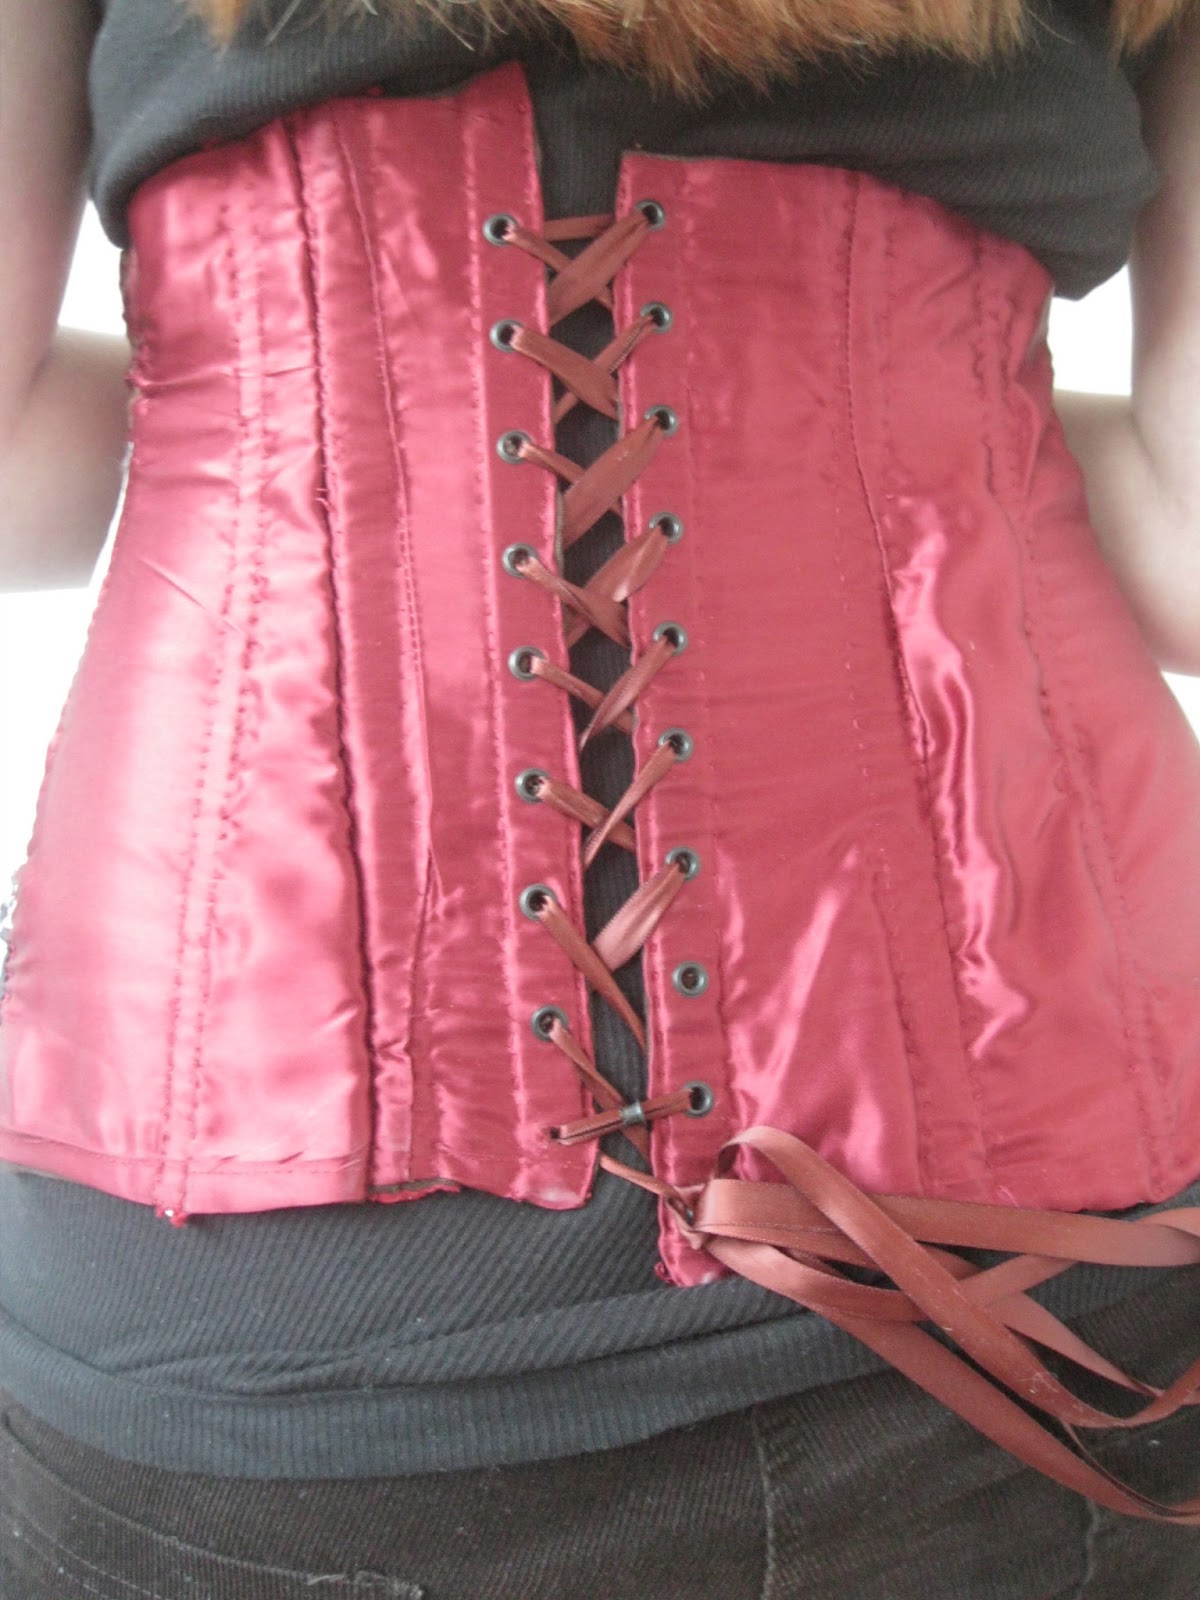
So I fixed up my corset this afternoon and it fits soooo much better now and that makes me incredibly happy with it. Just by replacing the broken and missing eyelets it got about ten times more comfortable and I was able to tighten it far more, which was a pleasant surprise. Below you can see a picture of the back with the new eyelets.

You can see that the shape is different from before, it actually creates noticeable curves now instead of just sort of, sitting there.

You can see that the shape is different from before, it actually creates noticeable curves now instead of just sort of, sitting there.
Tuesday 19 February 2013
Finished Corset Pictures
So I finished my patchwork corset! Well, I use the term 'finished' loosely. I'm far from happy with it, but let me show you some pictures before I state the corrections I want to make.


Overall I'm really pleased with it, it looks better than I thought it would and has given me lots of ideas for other things I'd like to make. In fact, it inspired an entire Steampunk ensemble and character (an airship pirate named Adrianna Ottilie Celendie Falenthorp or The Duchess, if anyone's curious...). But nevertheless it's too big, sloppily boned and in desperate, ardent need of some neatening up where the lacing bones are concerned. Thankfully this can all be fixed with some darts, a needle and thread and two more eyelets. In making this I really proved to myself that I need to stop being so generous with the seam allowance, in fact it might be better if I work off of the basis that less is better for a while. I'd love to hear some feedback on this so do drop me a line in the comments!
Next up t-shirt pictures!
Sunday 17 February 2013
Full Equipment List (for arts challenge)
Whilst I'm waiting for an opportunity to get around to taking pictures of my finished tops and corset I thought I'd post a full equipment list since that seems to be a thing. Here goes...
Silk Panels:
Silk-like fabric
Fabric paints
Fabric paint lightener
Brushes
Water
Paper (to put on the floor so it didn't get paint-y)
Computer (for entertainment purposes only)
T-shirts:
Primark t-shirts
Screen (for screen printing)
Squeegee (for screen printing)
Stencils (for screen printing)
Paints (for screen printing)
Scanner (for scanning in the finished screen prints)
Image transfer paper
Printer (for printing the images onto transfer paper)
Iron
Patchwork Corset:
Old toile
Newspaper (for pattern pieces)
Pencil (for drawing pattern pieces)
Chalk (for drawing onto material)
Scissors
Fabric for lining, brown twill
Fabric for back, burgundy silk
Fabric scraps for front
Fabric paint (for printing with)
Cardboard (for collagraphs)
Glue (for collagraphs)
Scraps of paper, foil, cellophane, paper, card (for collagraphs)
Acrylic paint (to be mixed with textile medium)
Textile medium
Brushes
Boards and paper (to cover the table)
Iron (to fix the fabric paint)
Pins
Sewing machine
Needles
Thread
Steel busk bones with closing clasps
Steel lacing bones
Steel bones, both 13mm and 7mm wide
Black eyelets
Eyelet kit
Hammer
Tissue (for wiping blood from fingers).
Well, there ya go!
~*~
Plan/steps for corset-making:
1: create collagraphs
2: draft pattern
3: cut out lining and back sections
4: print on the fabric scraps (see post about that here)
5: iron to fix paints
6: pin scraps together and sew (sew lining and back pieces as well, see some of that here)
7: iron flat
8: cut front segments from sewn together scrap pieces
9: sew front sections together
10: sew all the gather elements of the corset together
11: start inserting boning using pins
12: sew boning in
13: insert busk bones and lacing bones
14: sew in
15: put eyelets in (in the lacing bones)
16: slit material over hooks and stitch around them
17: lace with ribbon and wear
Wednesday 6 February 2013
Corset Progress: sewing
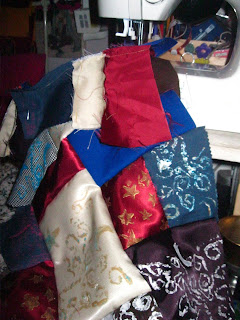
After I was done with the printing I ironed the pieces to fix the paint and then I began laying them out on the floor to get the arrangement right. It took a bit of fiddling around until I got them laid out in such a way that all pattern pieces fit.

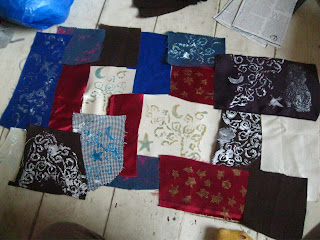
Once I was completely happy with it I pinned it and stitched everything together. This was a finicky languorous process and not particular enjoyable either.

Then it was a case of cutting out all the pieces I needed and pairing them with the pieces for the back that I cut out ages ago.


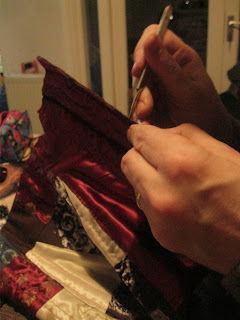
I stitched everything together and then I could start laying out and pinning on the steel boning. I decided to sew it all in by hand because after using the machine on two strips of boning I had gone through five needles.


I've never made a corset with a busk bone that opens before, so it was a little bit of a learning curve. It's not something that I could do with the machine since I needed to navigate around the closures.


Once the boning was in I had to put in a couple of darts, and I still have to put in more since it's far bigger and looser than I'd like.
I had to get my dad's help to but the eyelets in since whenever I try I mash up all the bits that bend backwards over the material.


The last thing I needed to do was slit the fabric over the top of the catches that slip into the closures, I then roughly stitched around the edges to ensure that they wouldn't fray so easily.
I have a few minor adjustments to make and then I can take some pictures of the finished thing!


Once I was completely happy with it I pinned it and stitched everything together. This was a finicky languorous process and not particular enjoyable either.


Then it was a case of cutting out all the pieces I needed and pairing them with the pieces for the back that I cut out ages ago.


I stitched everything together and then I could start laying out and pinning on the steel boning. I decided to sew it all in by hand because after using the machine on two strips of boning I had gone through five needles.


I've never made a corset with a busk bone that opens before, so it was a little bit of a learning curve. It's not something that I could do with the machine since I needed to navigate around the closures.


Once the boning was in I had to put in a couple of darts, and I still have to put in more since it's far bigger and looser than I'd like.
I had to get my dad's help to but the eyelets in since whenever I try I mash up all the bits that bend backwards over the material.


The last thing I needed to do was slit the fabric over the top of the catches that slip into the closures, I then roughly stitched around the edges to ensure that they wouldn't fray so easily.
I have a few minor adjustments to make and then I can take some pictures of the finished thing!
Subscribe to:
Posts (Atom)